Introduction: Why Use Jenkins EC2 Fleet Across AWS Accounts
What Are We Trying to Solve?
The Jenkins EC2 Fleet plugin lets Jenkins launch on-demand workers in a second AWS account.. In this setup, Jenkins runs in Account A, and the EC2 workers run in Account B.
We have Jenkins running in Account A, and we want to use Account B for Jenkins worker machines. When a Jenkins job starts, instead of using a worker that is already running, Jenkins should be able to request an EC2 worker in Account B through the EC2 Fleet plugin, which scales the Auto Scaling Group. The worker is then used to run the Jenkins job, and once the work is finished, it can be terminated so we don’t need to keep EC2 machines running when there are no builds. Since Jenkins and the EC2 workers are in different AWS accounts, Jenkins also needs permission to access the resources in Account B. We handle this securely using IAM Roles and STS AssumeRole, rather than storing permanent AWS access keys. This setup gives us on-demand Jenkins workers in Account B, while Jenkins continues to run in Account A.
This creates a problem:
How can Jenkins in Account A securely create and manage EC2 workers in Account B without storing permanent AWS access keys?
This is where AWS IAM cross-account roles, STS AssumeRole, Auto Scaling Groups, and the Jenkins EC2 Fleet plugin come together.
In this guide, we will build a Jenkins EC2 Fleet setup step by step:
This approach allows the organization to:
- Keep Jenkins and application infrastructure separated.
- Create workers only when they are needed.
- Automatically scale worker capacity.
- Avoid storing long-lived AWS access keys.
- Reduce the cost of keeping unused EC2 workers running.
Key Parts of a Jenkins EC2 Fleet Setup
| Part | Simple meaning |
|---|---|
| Jenkins Controller | The main Jenkins server. It receives jobs and decides when a worker is needed. |
| EC2 Worker | An EC2 machine that Jenkins uses to run the build |
| Auto Scaling Group (ASG) | Launches the EC2 worker instances from the launch template and terminates them when capacity goes down. Jenkins changes its desired capacity. |
| IAM Role | A set of AWS permissions that allows Jenkins or an EC2 instance to perform specific AWS actions. |
| IAM Instance Profile | Attaches an IAM role to an EC2 instance so the instance can use those permissions. |
| STS AssumeRole | A secure way for Jenkins to temporarily use a role in another AWS account. |
| Jenkins EC2 Fleet Plugin | A Jenkins plugin that connects Jenkins to the ASG and adjusts the ASG’s desired capacity to add or remove workers. |
| Label: ec2-fleet | The label Jenkins uses to identify which workers should run a particular job. |
Jenkins EC2 Fleet cross-account architecture using STS AssumeRole
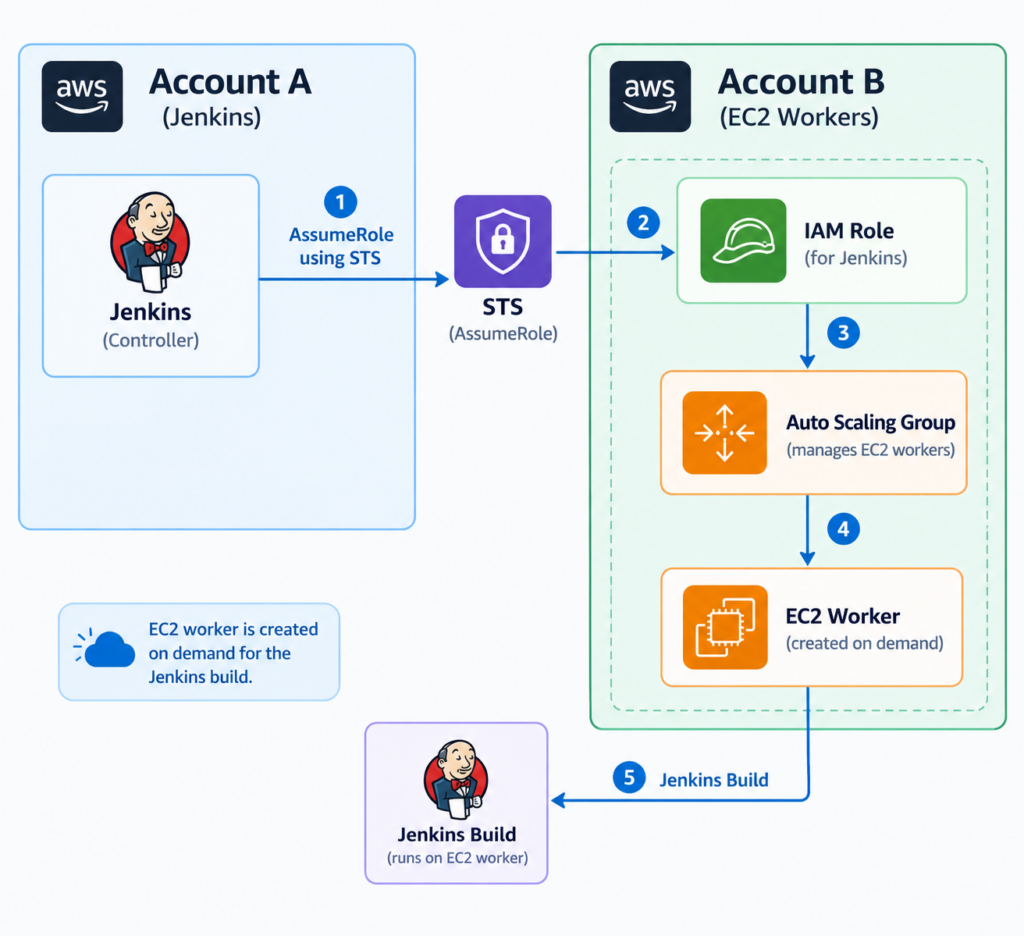
Jenkins is running in Account A, while the EC2 workers are created in Account B. When a Jenkins job needs a worker, Jenkins uses STS AssumeRole to temporarily access the required IAM role in Account B. The plugin then raises the ASG’s desired capacity, and the ASG launches the required EC2 worker in Account B.
This means Jenkins can manage the workers in Account B without storing permanent AWS access keys.
Prerequisites
Before starting the setup, make sure you have:
- Two AWS accounts: Account A for Jenkins and Account B for workers.
- The IAM role attached to the Jenkins EC2 instance in Account A already exists (for example,
jenkins-controller-role) and is attached to the instance through an instance profile. You will need this role’s ARN in Step 1. - IAM access in both accounts for the initial setup.
- Amazon EC2 Fleet Plugin installed in Jenkins.
- AWS Credentials Plugin installed in Jenkins.
- An Auto Scaling Group in Account B that will be used for Jenkins workers.
- A launch template in Account B with the configuration required for the Jenkins worker EC2 instance.
Step 1: Create a Role in Account B
First, create a role in Account B for Jenkins to use. This role says what Jenkins is allowed to do with the worker infrastructure.
1.1: Create the IAM Role
- Log in to Account B and open the IAM console.
- In the left sidebar, click Roles → Create role.
- Under Trusted entity type, select Custom trust policy.
- Delete the default JSON and paste in the trust policy shown below (Section 1.2), replacing the placeholders with your real Account A details.
- Click Next.
- On the Add permissions page, click Next for now—you’ll attach the permissions policy in Section 1.3.
- Give the role a name, for example:
jenkins-cross-account-worker-role. - Review the details and click Create role.
1.2:Tell Account B to Trust Account A
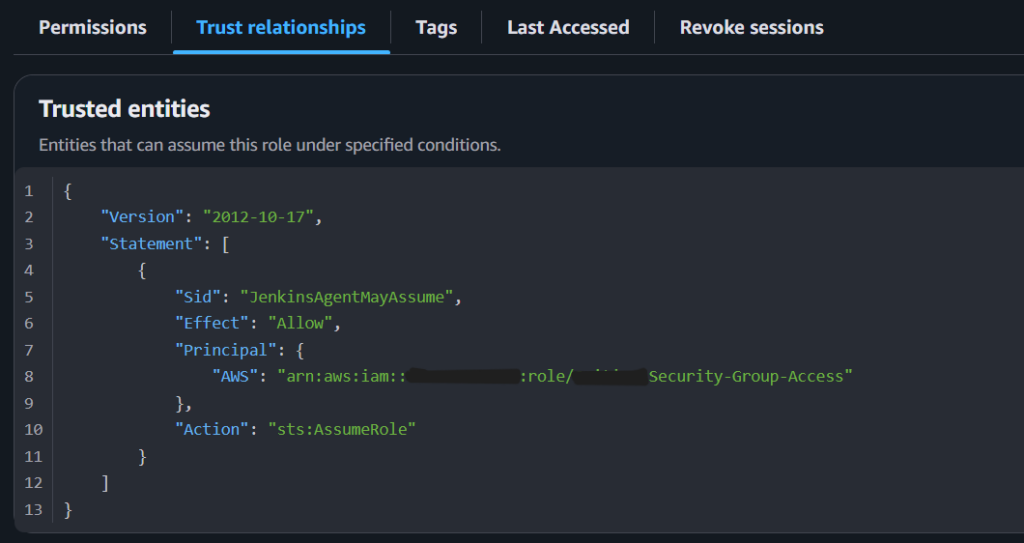
The trust policy answers one question: ‘Who is allowed to use this role?’ In our case, it is the Jenkins EC2 role from Account A (jenkins-controller-role). The Principal in-the-trust policy must be that role’s ARN, so the role has to exist before you create this trust policy. If you don’t have the ARN yet, open IAM → Roles in Account A, click the role, and copy the ARN from the summary.
{
  "Version": "2012-10-17",
  "Statement": [
    {
      "Effect": "Allow",
      "Principal": {
        "AWS": "arn:aws:iam::<ACCOUNT-A-ID>:role/<JENKINS-EC2-ROLE-NAME>"
      },
      "Action": "sts:AssumeRole"
    }
  ]
}
This is the JSON you paste into the Custom trust policy box in Section 1.1, step 4. If you’re editing an existing role instead of creating a new one:
- Open IAM → Roles, and click your role(
jenkins-cross-account-worker-role). - Go to the Trust relationships tab.
- Click Edit trust policy.
- Paste in the JSON above and click Update policy.
1.3 Give the Role the Required Permissions
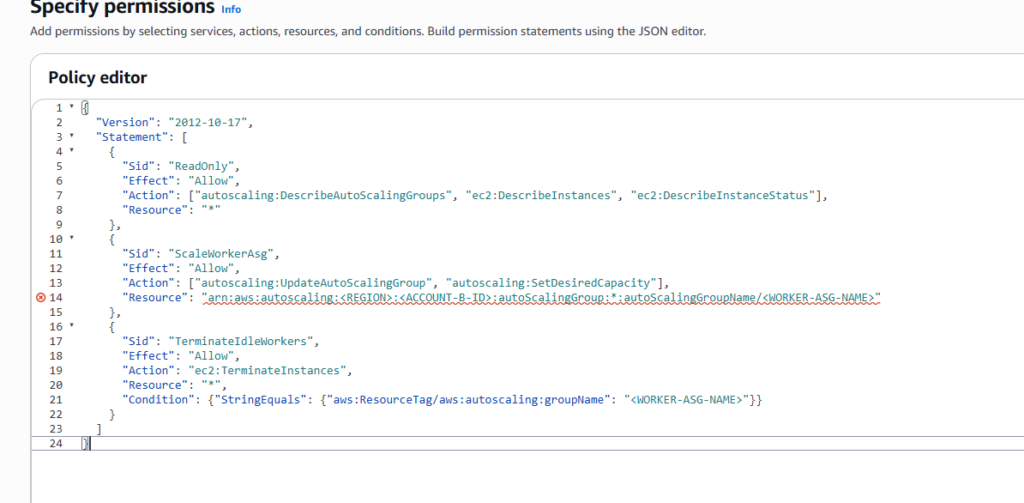
The Account B role needs permissions to see EC2 instances and control the Auto Scaling Group.
{
  "Version": "2012-10-17",
  "Statement": [
    {
      "Sid": "ReadOnly",
      "Effect": "Allow",
      "Action": ["autoscaling:DescribeAutoScalingGroups", "ec2:DescribeInstances", "ec2:DescribeInstanceStatus"],
      "Resource": "*"
    },
    {
      "Sid": "ScaleWorkerAsg",
      "Effect": "Allow",
      "Action": ["autoscaling:UpdateAutoScalingGroup", "autoscaling:SetDesiredCapacity"],
      "Resource": "arn:aws:autoscaling:<REGION>:<ACCOUNT-B-ID>:autoScalingGroup:*:autoScalingGroupName/<WORKER-ASG-NAME>"
    },
    {
      "Sid": "TerminateIdleWorkers",
      "Effect": "Allow",
      "Action": "ec2:TerminateInstances",
      "Resource": "*",
      "Condition": {"StringEquals": {"aws:ResourceTag/aws:autoscaling:groupName": "<WORKER-ASG-NAME>"}}
    }
  ]
}
To attach this as a policy on the role:
Step 2: Allow Jenkins to Assume the Role
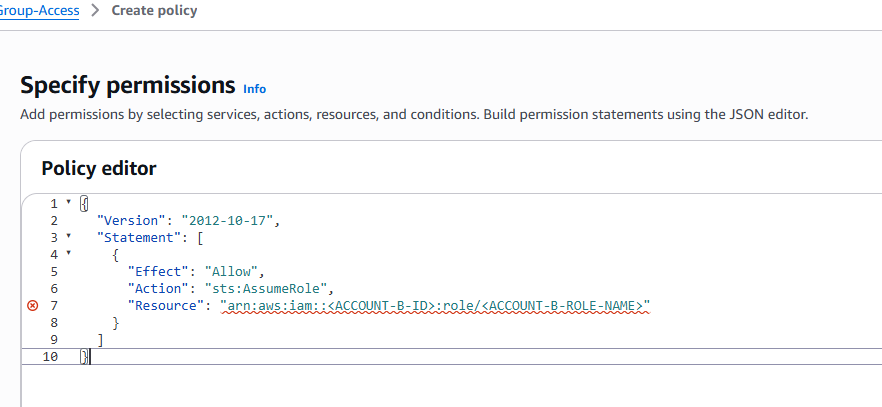
Now we need to give the Jenkins EC2 instance in Account A permission to assume the role we created in Account B.
Add this policy to the IAM role attached to the Jenkins EC2 instance:
{
  "Version": "2012-10-17",
  "Statement": [
    {
      "Effect": "Allow",
      "Action": "sts:AssumeRole",
      "Resource": "arn:aws:iam::<ACCOUNT-B-ID>:role/<ACCOUNT-B-ROLE-NAME>"
    }
  ]
}
To attach it:
- In Account A, open IAM → Roles, and click your Jenkins EC2 role (e.g.
jenkins-controller-role). - Go to the Permissions tab.
- Click Add permissions → Create inline policy.
- Switch to the JSON editor tab.
- Paste in the JSON above, replacing
<ACCOUNT-B-ID>and<ACCOUNT-B-ROLE-NAME>with your real values. - Click Next, give the policy a name (e.g.
assume-account-b-role), and click Create policy.
Your Jenkins EC2 instance should use this IAM role through an instance profile. This means Jenkins can get AWS credentials from the EC2 instance without storing an access key and secret key.
Step 3: Add the Role in Jenkins
- Open Jenkins.
- Go to Manage Jenkins → Credentials.
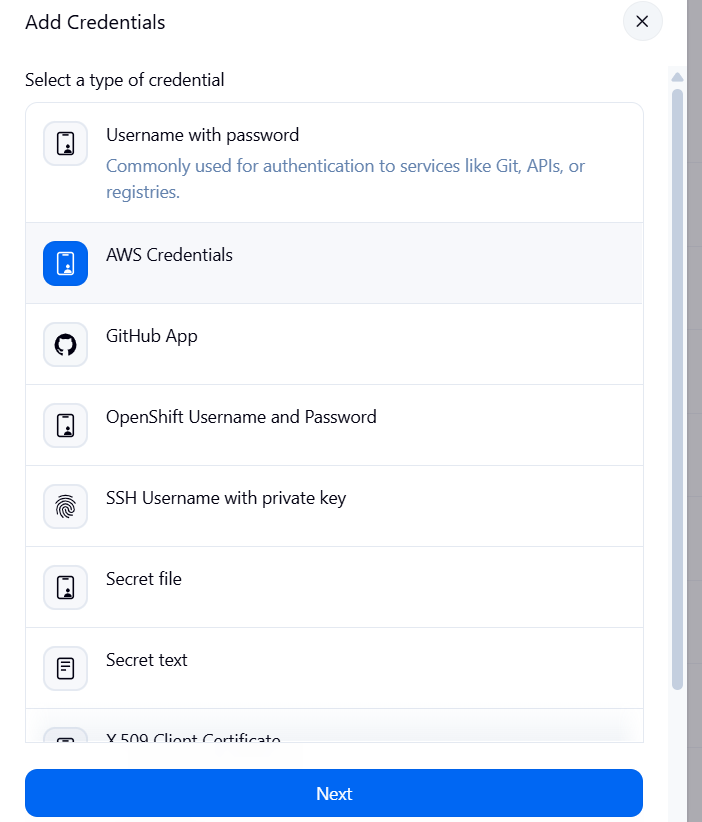
- Select the appropriate credentials store and click Add Credentials.
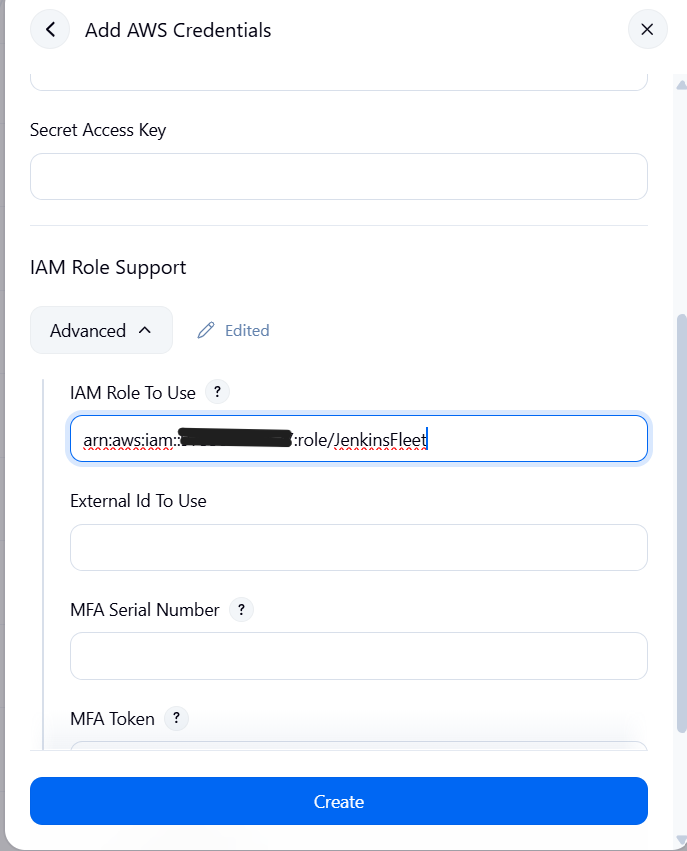
- For Kind, select AWS Credentials.
- Leave Access Key ID and Secret Access Key blank. Expand Advanced and set only the IAM Role to assume (Role ARN) to the Account B role ARN.
- Expand Advanced. In the IAM Role to assume / Role ARN field, enter the Account B IAM Role ARN.
- Example:
arn:aws:iam::<ACCOUNT-B-ID>:role/<ACCOUNT-B-ROLE-NAME>
- Example:
- Give the credential an ID, for example:
aws-account-b-role
- Click Create/Save.
Step 4: Configure the Jenkins EC2 Fleet Cloud
Tell Jenkins which Auto Scaling Group should provide the workers:
- Go to Manage Jenkins → Clouds.
- Add a new cloud and choose Amazon EC2 Fleet.
- Select the AWS credential created in the previous step.
- Select the AWS region where the worker ASG exists.
- Select the Auto Scaling Group from Account B.
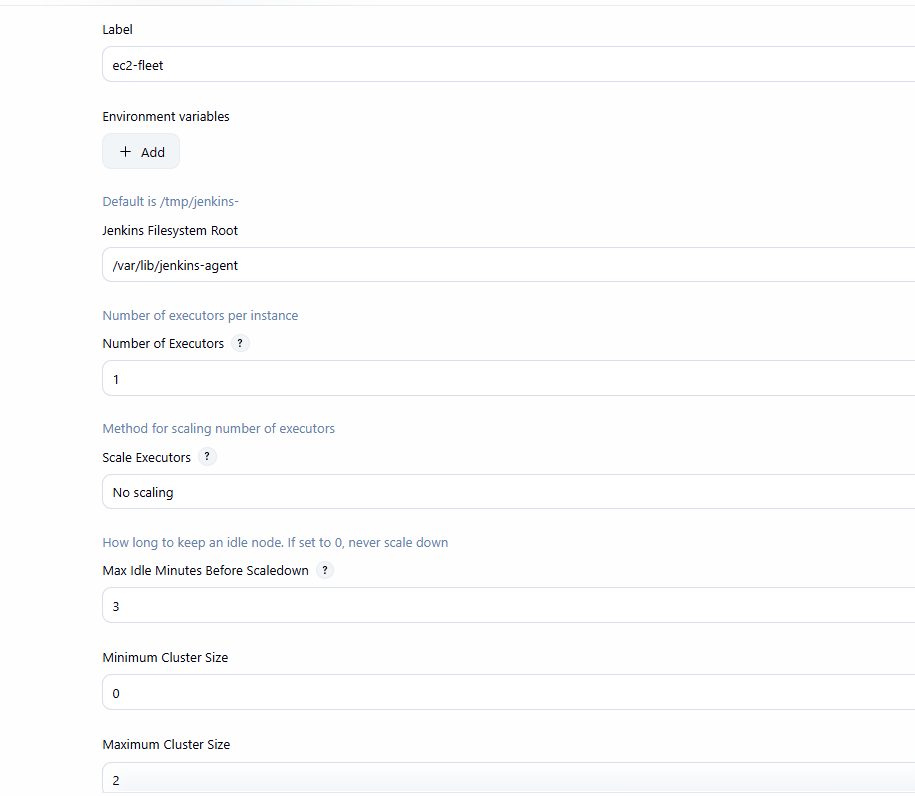
- Set the worker label to ec2-fleet.
- Set minimum and maximum worker capacity.
- Set an idle timeout.
- Save the configuration.
Step 5: Check the Worker EC2 Setup
Before running a build, make sure the Jenkins EC2 Fleet worker can actually connect to Jenkins.
- The worker AMI should have Java and the required Jenkins agent prerequisites.
- The worker needs network connectivity back to the Jenkins controller.
- Security groups and network rules must allow the required agent connection.
- The ASG should have suitable minimum and maximum capacity.
- A minimum capacity of 0 can be used when workers should only start when needed.
Step 6: Tell Your Pipeline to Use the Worker
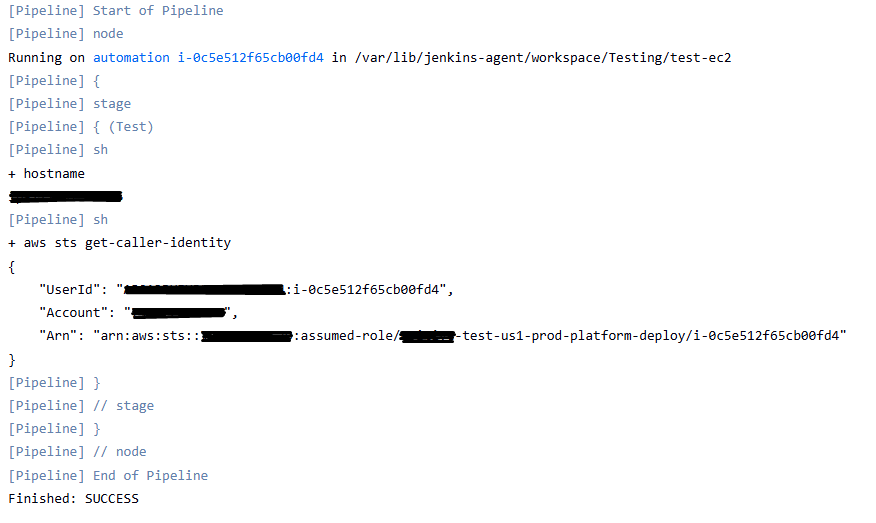
The pipeline uses the label ec2-fleet:
pipeline {
    agent { label 'ec2-fleet' }

    stages {
        stage('Verify Worker') {
            steps {
                sh 'whoami'
                sh 'aws sts get-caller-identity'

            }
        }
    }
}
The important line for this example is:
agent { label 'ec2-fleet' }It tells Jenkins, ‘Run this pipeline on an agent with the ec2-fleet label.’
How Jenkins EC2 Fleet Scales Workers During a Build
- Jenkins looks for an available worker with the ec2-fleet label.
- If no worker is available, Jenkins uses the EC2 Fleet cloud configuration.
- Jenkins assumes the role in Account B.
- The plugin increases the Auto Scaling Group’s desired capacity.
- The ASG launches a new EC2 worker in Account B from the launch template.
- The worker connects to Jenkins.
- The pipeline runs on the worker.
- After the worker is idle for the configured timeout, the fleet can scale down.
In one line
Build starts → worker is created → build runs → worker becomes idle → capacity scales down.
Common Jenkins EC2 Fleet Problems and Simple Checks
- Jenkins cannot assume the Account B role
- Check both sides: Account A must allow sts:AssumeRole, and Account B must trust the Account A Jenkins role.
- AccessDenied for Auto Scaling
- Check that the Account B role has the required autoscaling: Describe* and autoscaling: SetDesiredCapacity / UpdateAutoScalingGroup permissions.
- Worker starts but does not connect to Jenkins
- Check security groups, routes, DNS, firewall rules, and the selected Jenkins agent connection method.
- Jenkins cannot find the ASG
- Check that the EC2 Fleet cloud uses the correct AWS region and that the assumed role can describe Auto Scaling Groups.
- Everything worked before a plugin upgrade
- Check the Jenkins EC2 Fleet plugin version and its changelog. Test a known-good version if needed.
Conclusion
With the Jenkins EC2 Fleet plugin, we can create Jenkins workers on demand instead of keeping EC2 instances running all the time. In this setup, Jenkins runs in Account A, while the EC2 workers are created in Account B.
Using IAM Roles and STS AssumeRole, Jenkins can securely access the required resources in Account B without storing permanent AWS access keys. The plugin scales the Auto Scaling Group, and the ASG creates the workers using the launch template.
This setup gives us a simple way to separate Jenkins from the build infrastructure, create workers when needed, and avoid unnecessary running EC2 instances.