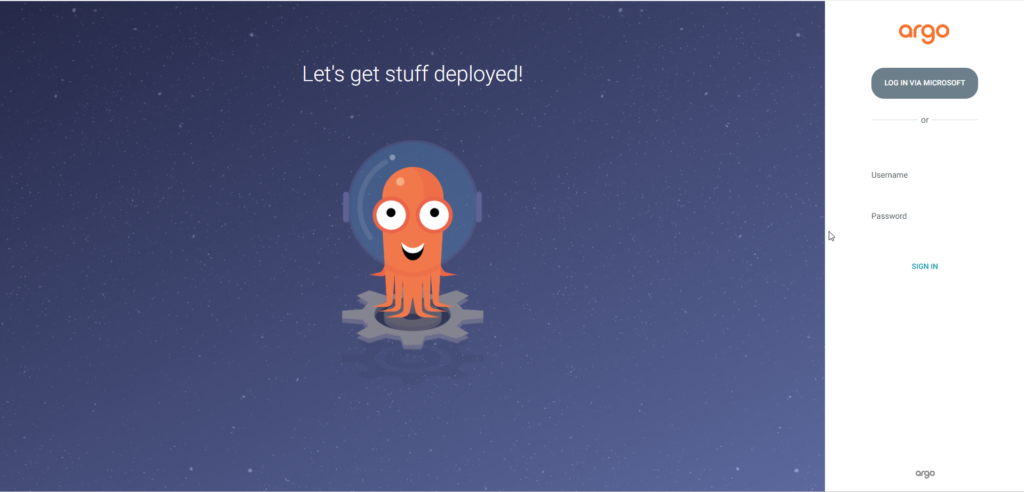
In the ever-evolving landscape of DevOps, Continuous Deployment (CD) has become a cornerstone of efficient and reliable software delivery. ArgoCD, a declarative, GitOps continuous delivery tool for Kubernetes, is a powerful ally in this domain. However, managing access and ensuring security can be a challenge. Integrating ArgoCD with Microsoft Azure Active Directory (AD) simplifies authentication and enhances security by leveraging existing Azure AD credentials.
Why Integrate ArgoCD with Azure AD?
- Unified Authentication: Leverage existing Azure AD credentials for ArgoCD access.
- Enhanced Security: Utilize Azure AD’s robust security features such as Multi-Factor Authentication (MFA).
- Simplified User Management: Centralize user management in Azure AD, reducing the need to manage separate credentials.
- Scalability: Easily manage access for large teams and organizations.
Prerequisites:
Before integrating ArgoCD with Azure AD, ensure you have the following:
- An Azure AD tenant.
- Administrative access to your Azure AD tenant.
- An ArgoCD instance running in your Kubernetes cluster.
- Admin access to your Kubernetes cluster.
Step-by-Step Guide to Integrate ArgoCD with Azure:
1. Configure a new Entra ID Enterprise App
- From the Microsoft Entra ID > Enterprise applications menu, choose + New application.
- Enter a Name for the application (e.g. Argo CD), then choose Create.
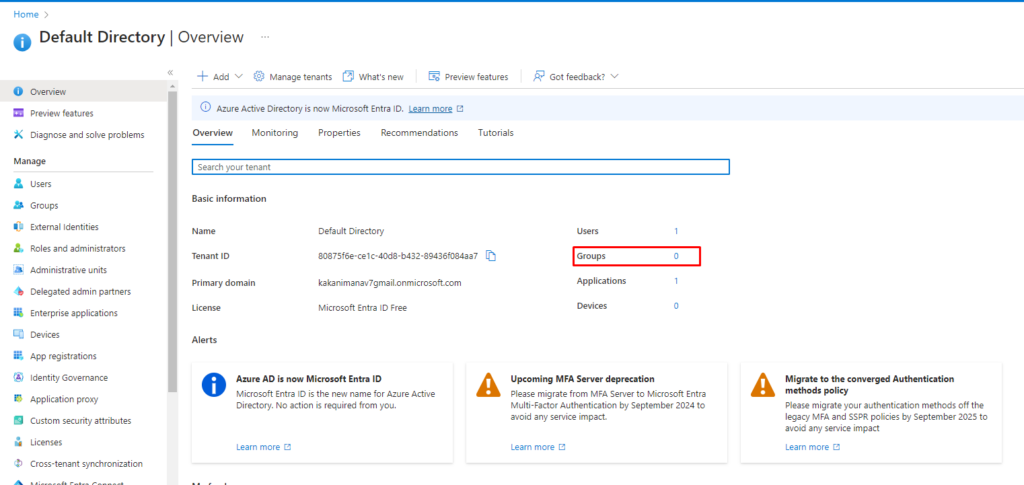
2. Create a new group from your Main Directory:
- Click on groups as shown below
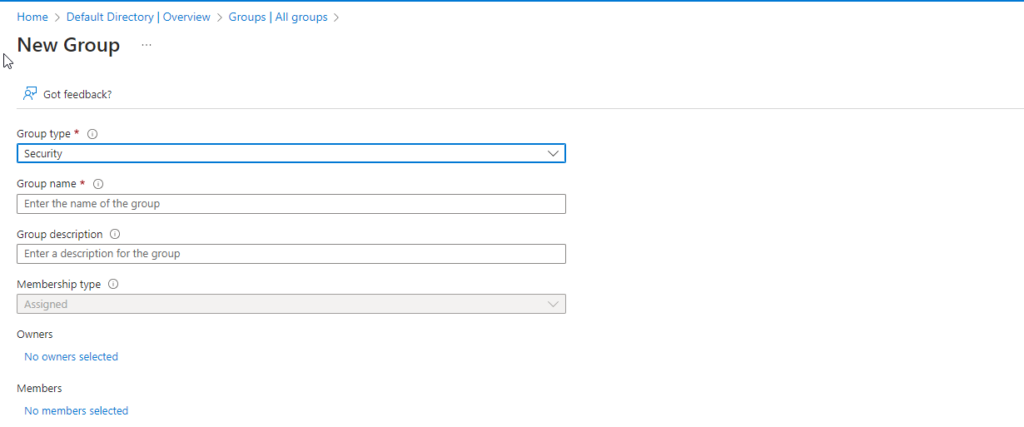
- Create a new group with Security Type.
3. Add this group or users to the new created users
- For this go to your app and choose the option Users and groups and click on Add groups/users:
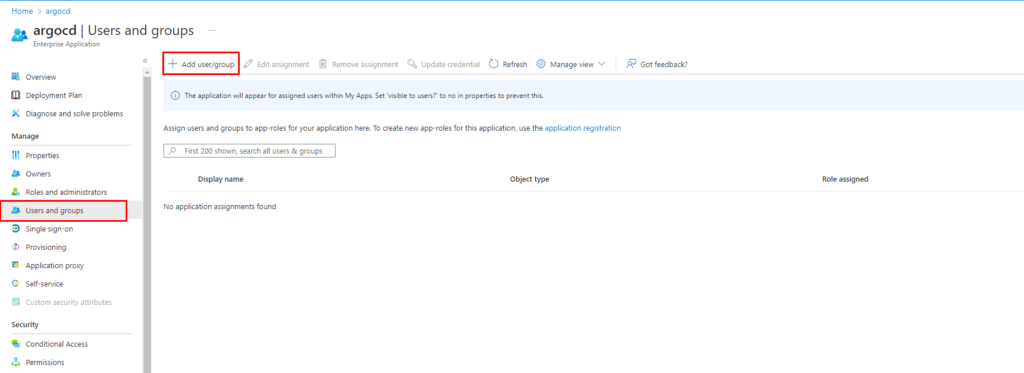
- Then select the group or users you have to give access to this Application.
4. Configure the SAML Login
- To configure the saml login go to the option Single sign-on and select the SAML option:
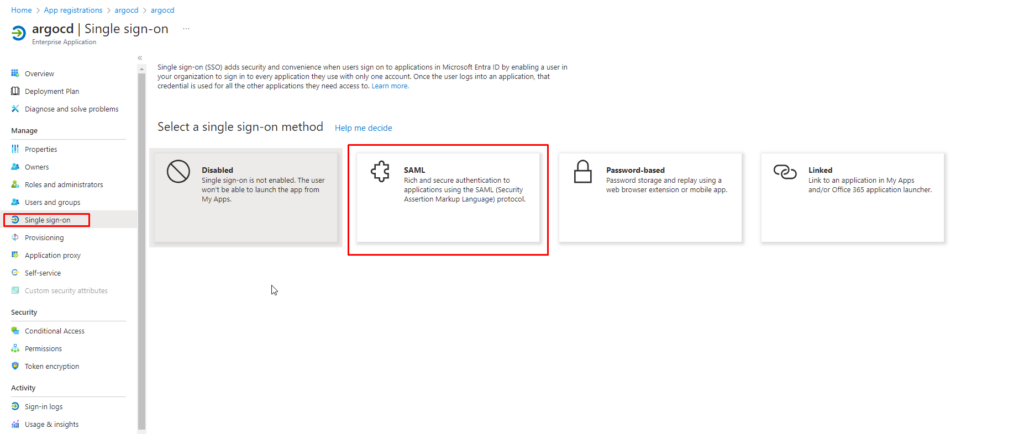
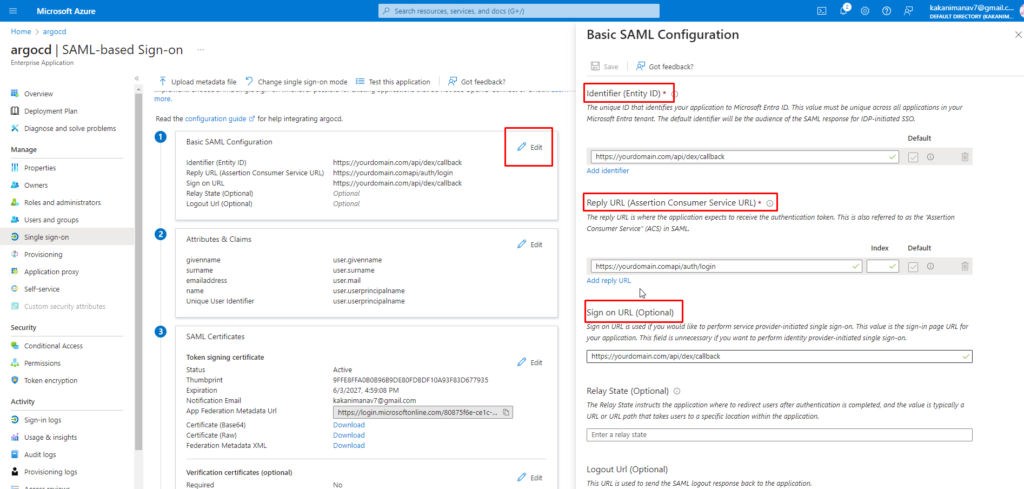
- After this From the Single sign-on menu, edit the Basic SAML Configuration section as follows:
- Identifier (Entity ID): https://your-argo-cd-url/api/dex/callback
- Reply URL (Assertion Consumer Service URL): https://your-argo-cd-url/api/dex/callback
- Sign on URL: https://your-argo-cd-url/auth/login
- Relay State: empty
- Logout Url: empty
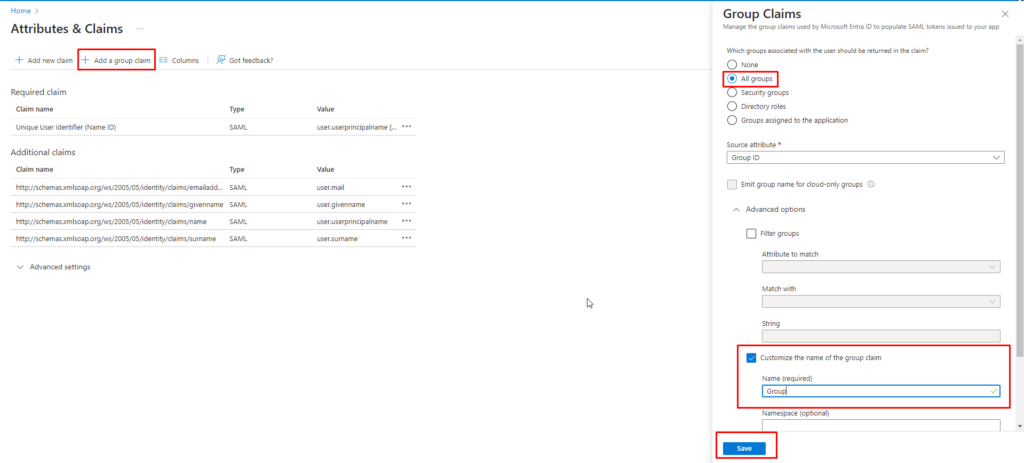
- Now edit the User attributes & claims and create the following claims:
- Select Add group claim and configure as follow:
- Which groups: All groups | Source attribute: Group ID | Customize: True | Name: Group | Namespace: | Emit groups as role claims: False
5. Download the SAML Signing Certificate (base 64) from the Single sign-on Menu:
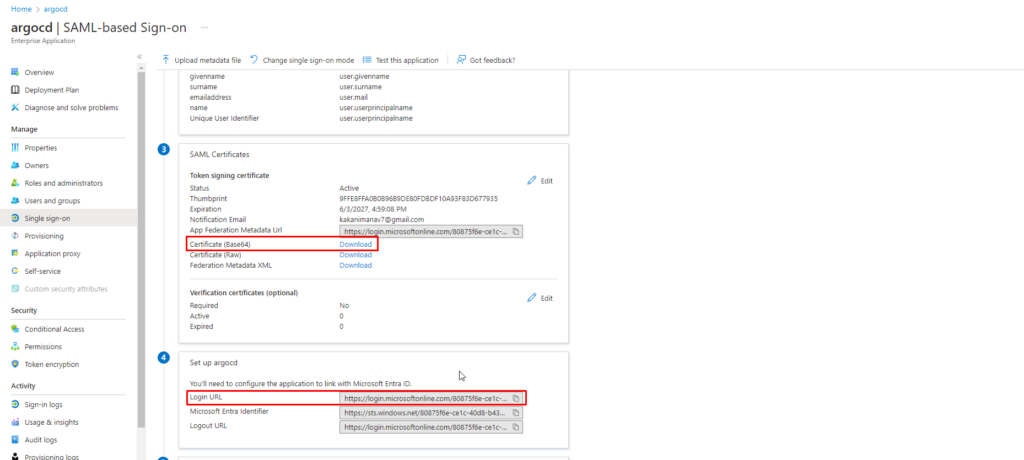
- After download the certificate Encode it to the BASE 64
- EX: cat <your-file-name>(eg. Argocd.cer) | base64
- Keep a copy of the output and Login URL for configuration.
6. Configure Argo to use the new Entra ID Enterprise App:
- Edit argocd-cm and add the following dex.config to the data section:
apiVersion: v1
data:
  url: <your-argocd-url>
  dex.config: |
    logger:
      level: debug
      format: json
    connectors:
    - type: saml
      id: saml
      name: Microsoft
      config:
        entityIssuer: https://<your-argocd-url>/api/dex/callback
        ssoURL: https://login.microsoftonline.com/<your-tenant-id>/saml2
        caData: |
           BASE64-ENCODED-CERTIFICATE-DATA
        redirectURI: https://<your-argocd-url>/api/dex/callback
        usernameAttr: http://schemas.xmlsoap.org/ws/2005/05/identity/claims/emailaddress
        emailAttr: http://schemas.xmlsoap.org/ws/2005/05/identity/claims/emailaddress
groupsAttr: http://schemas.microsoft.com/ws/2008/06/identity/claims/groups- Edit your argocd-rbac-cm to give permission to group/user to use argocd. Add the following configuration in argocd-rbac-cm configmap’s data section:
data:
policy.csv: |
  p, role:org-admin, applications, *, *, allow
  p, role:org-admin, clusters, get, *, allow
  p, role:org-admin, repositories, get, *, allow
  p, role:org-admin, repositories, create, *, allow
  p, role:org-admin, repositories, update, *, allow
  p, role:org-admin, repositories, delete, *, allow
  g, "add-your-group-id-here", role:org-admin
7. Validation:
- Open a new browser tab and enter your ArgoCD URL