How to Implement Single Sign-On (SSO) with Azure AD on Self Manage GitLab Enterprise version
- Written by:-
- Yash Rathod
- Azure
- No Comments
Single Sign-On (SSO) is a user authentication process that allows a user to access multiple applications with one set of login credentials. Implementing SSO can significantly enhance security and user experience by reducing the need for multiple usernames and passwords. This blog will guide you through setting up SSO between a self-managed GitLab Enterprise instance and Azure Active Directory (AD).
Prerequisite:
- A self-managed GitLab Enterprise instance.
- An Azure Active Directory tenant with the necessary admin rights.
- Basic understanding of GitLab and Azure AD.
Step1: Install and configure the necessary dependencies
					sudo apt-get update
sudo apt-get install -y curl openssh-server ca-certificates tzdata perl
Next, install Postfix (or Send-mail) to send notification emails. If you want to use another solution to send emails, please skip this step and configure an external SMTP server after GitLab has been installed
sudo apt-get install -y postfix
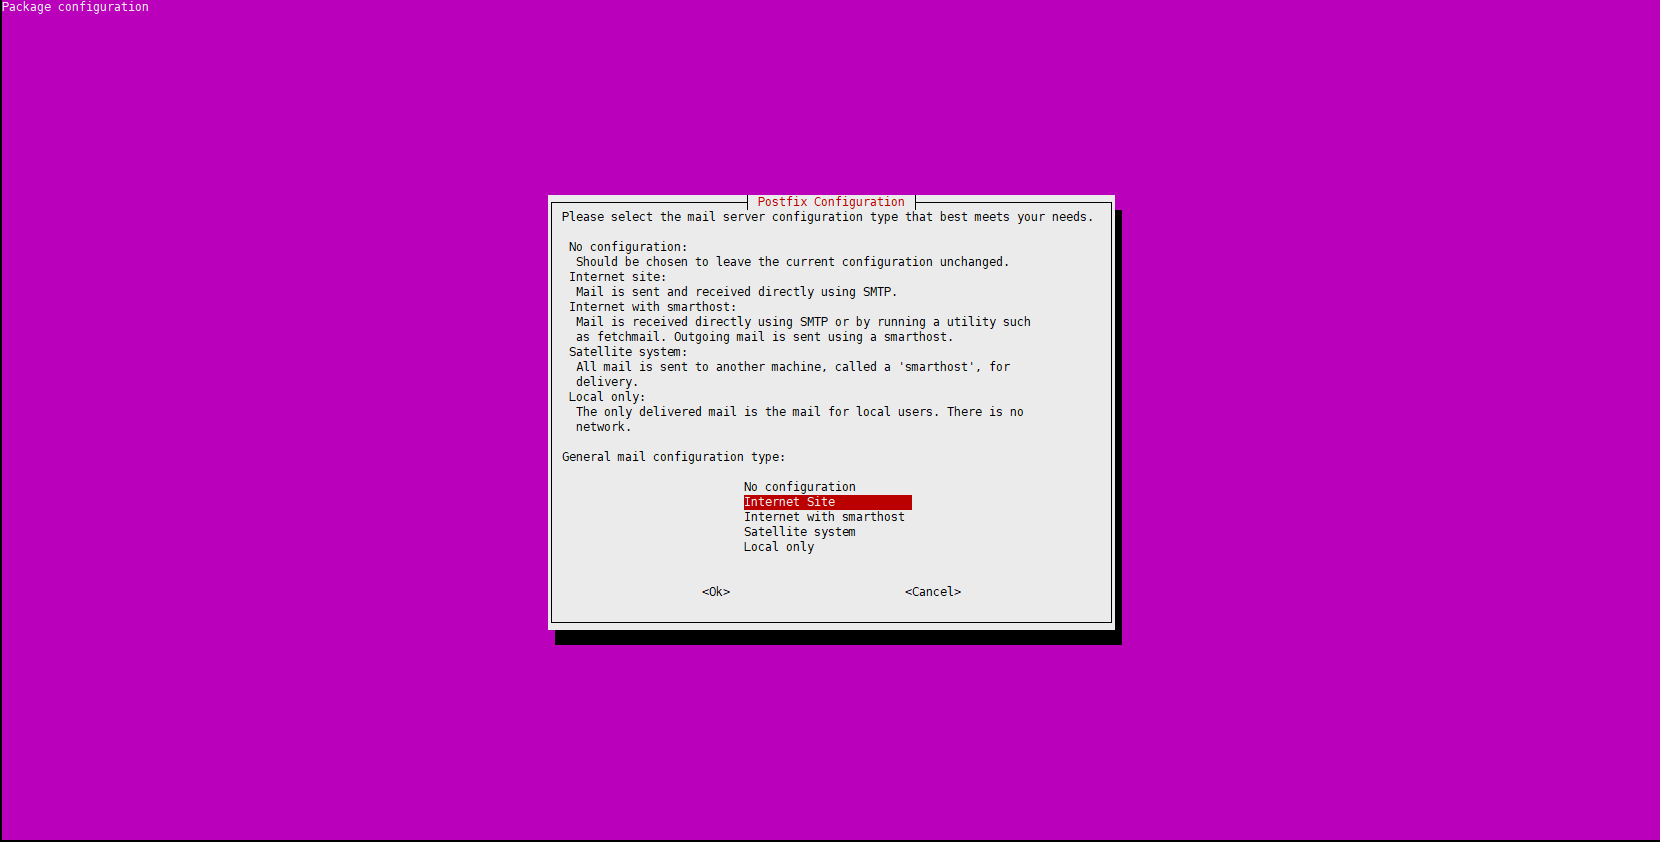

During Postfix installation a configuration screen may appear. Select ‘Internet Site’ and press enter. Use your server’s external DNS for ‘mail name’ and press enter. If additional screens appear, continue to press enter to accept the defaults.
Add the GitLab package repository and install the package
curl https://packages.gitlab.com/install/repositories/gitlab/gitlab-ee/script.deb.sh | sudo bash
Next, install the GitLab package. Make sure you have correctly set up your DNS, and change https://gitlab.example.com to the URL at which you want to access your GitLab instance. Installation will automatically configure and start GitLab at that URL.
For https:// URLs, GitLab will automatically request a certificate with Let’s Encrypt, which requires inbound HTTP access and a valid hostname. You can also use your own certificate or just use http:// (without the s).
If you would like to specify a custom password for the initial administrator user (root), check the documentation. If a password is not specified, a random password will be automatically generated.
sudo EXTERNAL_URL="https://gitlab.example.com" apt-get install gitlab-ee
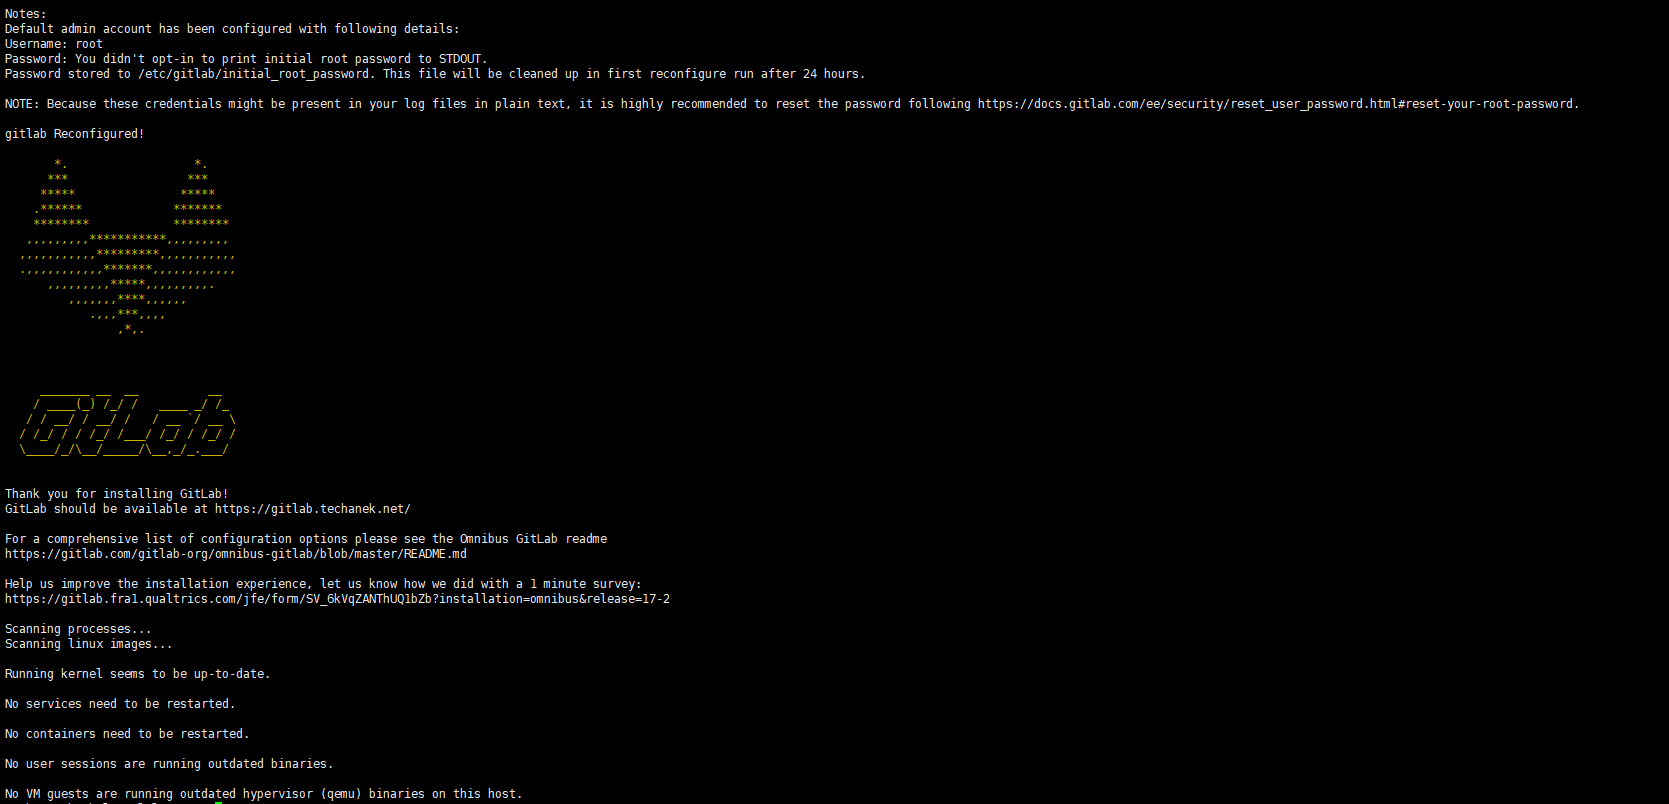
Browse to the hostname and login
Unless you provided a custom password during installation, a password will be randomly generated and stored for 24 hours in /etc/gitlab/initial_root_password. Use this password with username “root” to login.


Set up the initial account
By default, a Linux package installation automatically generates a password for the initial administrator user account (root) and stores it to /etc/gitlab/initial_root_password for at least 24 hours. For security reasons, after 24 hours, this file is automatically removed by the first gitlab-ctl reconfigure.
The default account is tied to a randomly generated email address. To override this, pass the GITLAB_ROOT_EMAIL environment variable to the installation command.
If GitLab can’t detect a valid hostname for the server during the installation, a reconfigure does not run.
To provide a custom initial root password, you have two options:
Pass the GITLAB_ROOT_PASSWORD environment variable to the installation command provided the hostname for the server is set up correctly:
sudo GITLAB_ROOT_EMAIL="<gitlab_admin@example.com>" GITLAB_ROOT_PASSWORD="<strongpassword>" EXTERNAL_URL="http://gitlab.example.com" apt install gitlab-ee
If during the installation GitLab doesn’t automatically perform a reconfigure, you must pass the GITLAB_ROOT_PASSWORD or GITLAB_ROOT_EMAIL variable to the first gitlab-ctl reconfigure run.
Before the first reconfigure, edit /etc/gitlab/gitlab.rb (create it if it doesn’t exist) and set:
gitlab_rails['initial_root_password'] = '<my_strong_password>'
Both of these methods apply only during the initial database seeding, which happens during the first reconfigure. For subsequent reconfigure runs, neither of the aforementioned methods have any effect. In that case, use the random password in /etc/gitlab/initial_root_password to log in, or reset the root password.
Step2: Make Enterprise Application
- Azure AD > Enterprise applications > Create your own application.
- Give application Name.
- Select: “Integrate any other application you don’t find in the gallery (Non-gallery).”
- Follow prompts to configure.
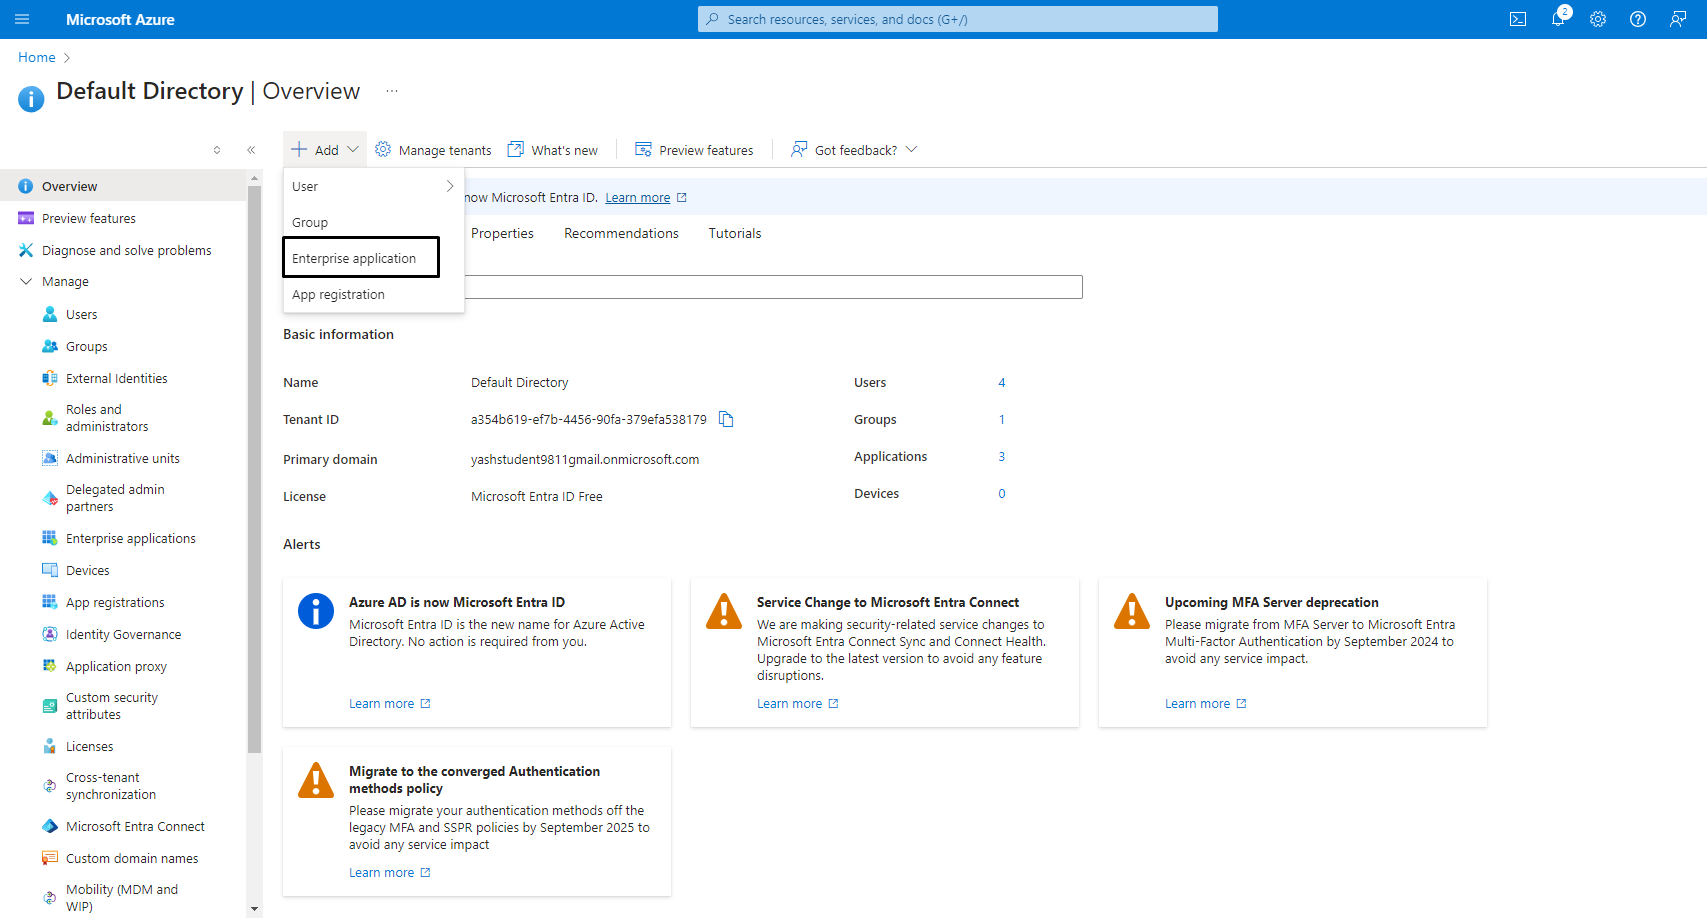
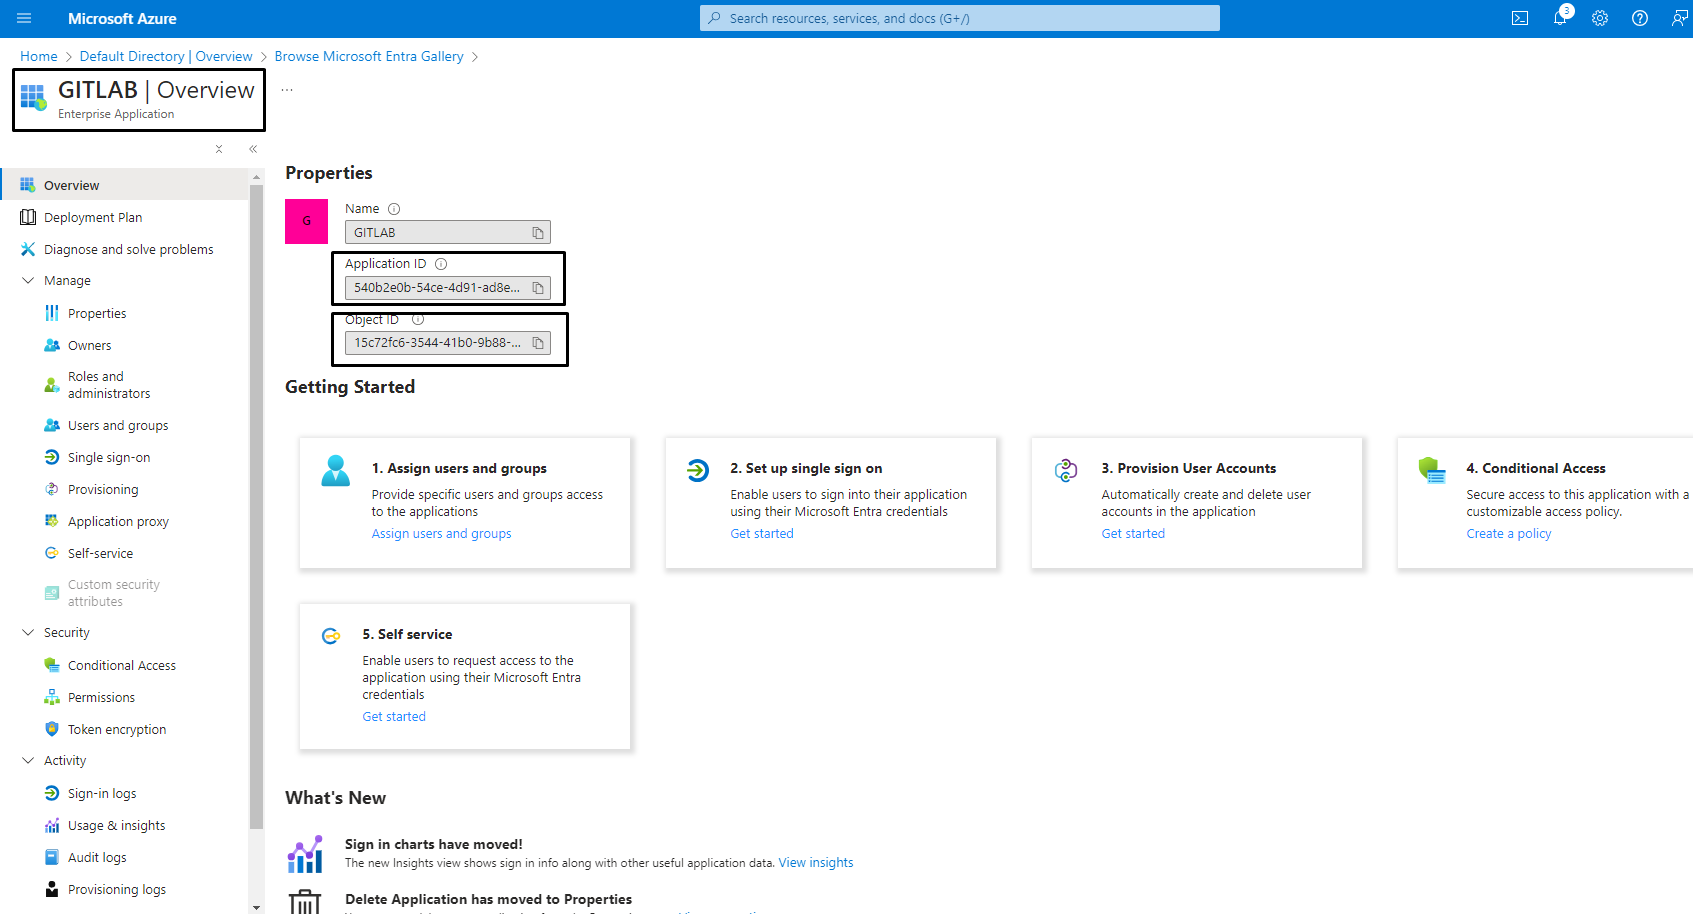
To enable the Microsoft Azure OAuth 2.0 OmniAuth provider, you must register an Azure application and get a client ID and secret key.
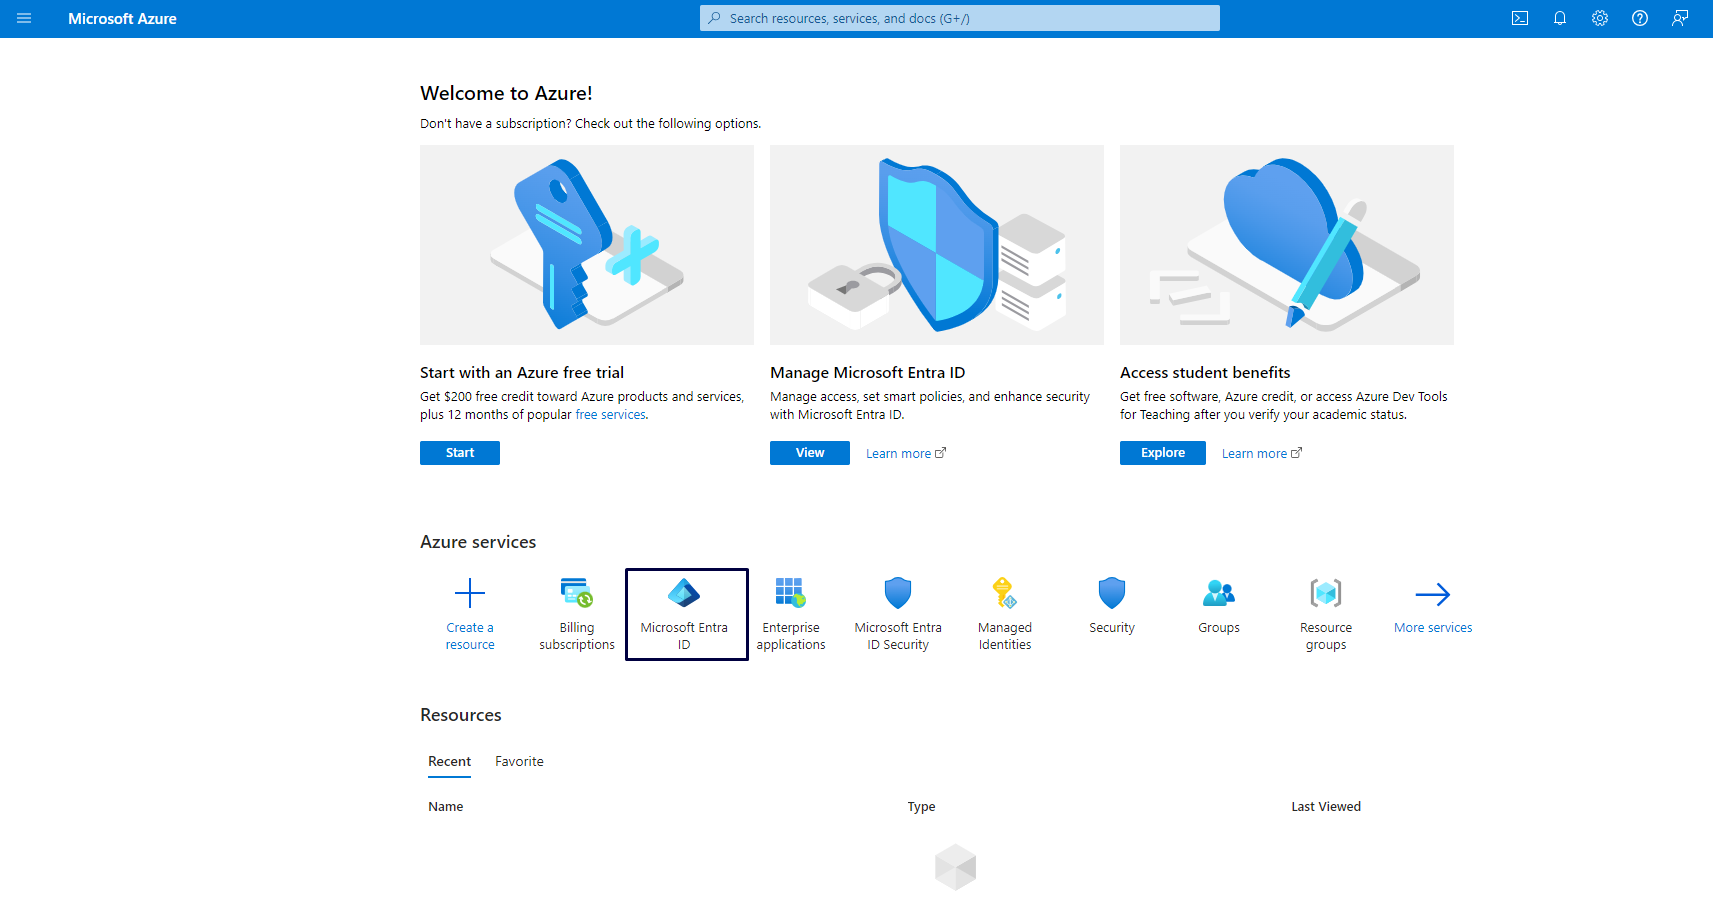
Sign in to the Azure portal.
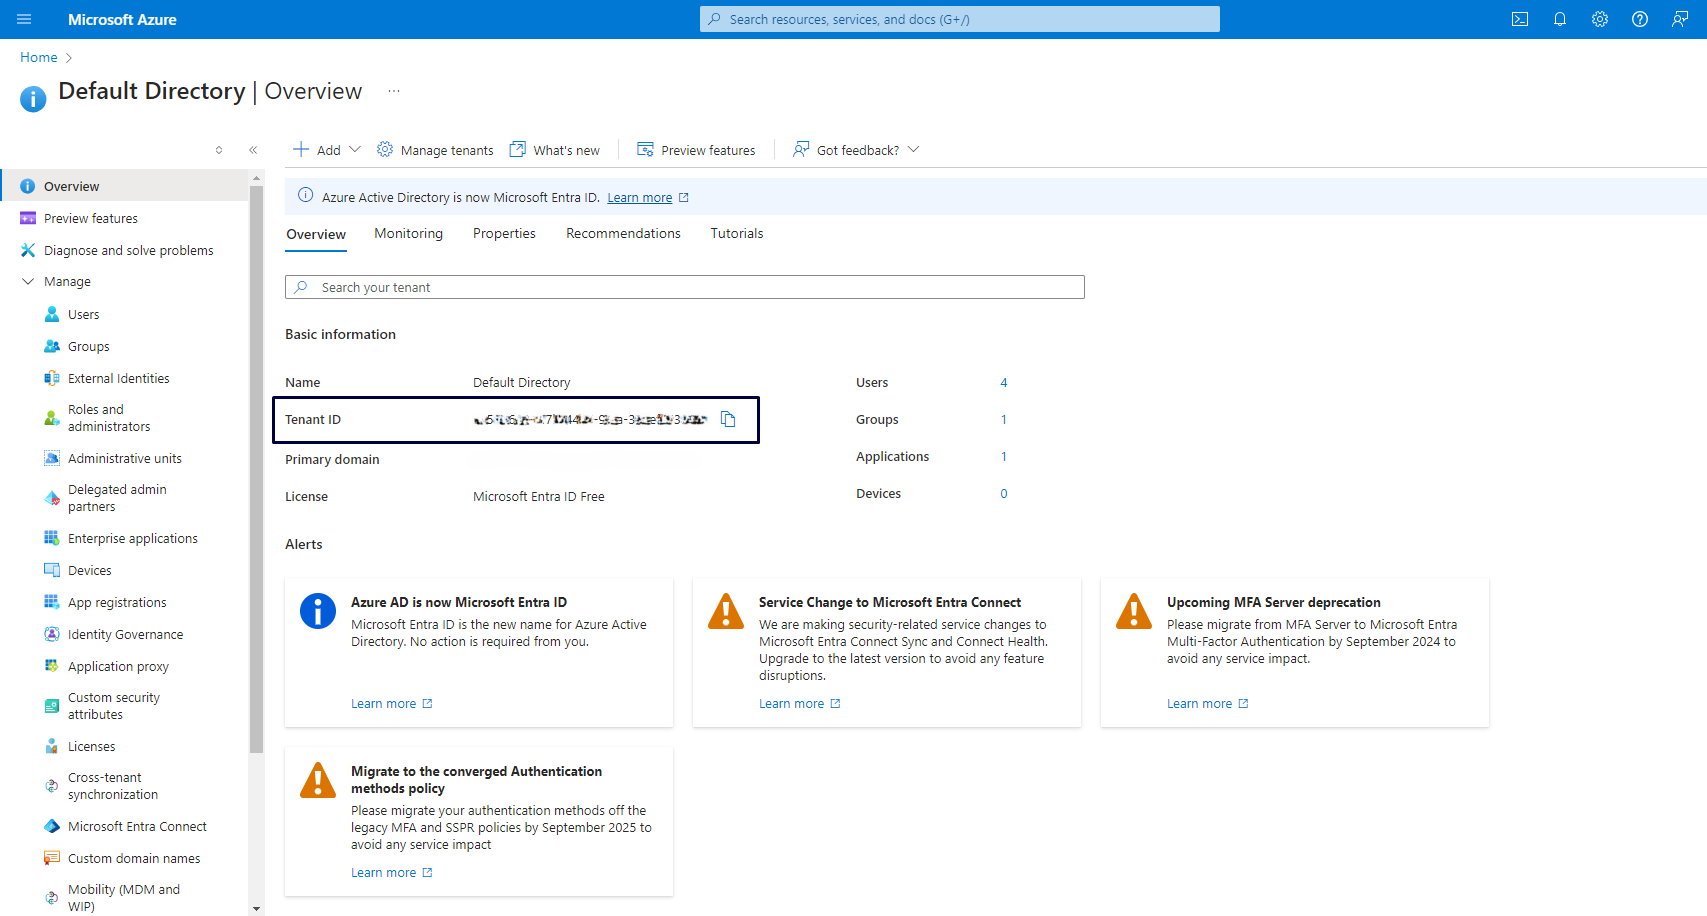
If you have multiple Azure Active Directory tenants, switch to the desired tenant. Note the tenant ID.
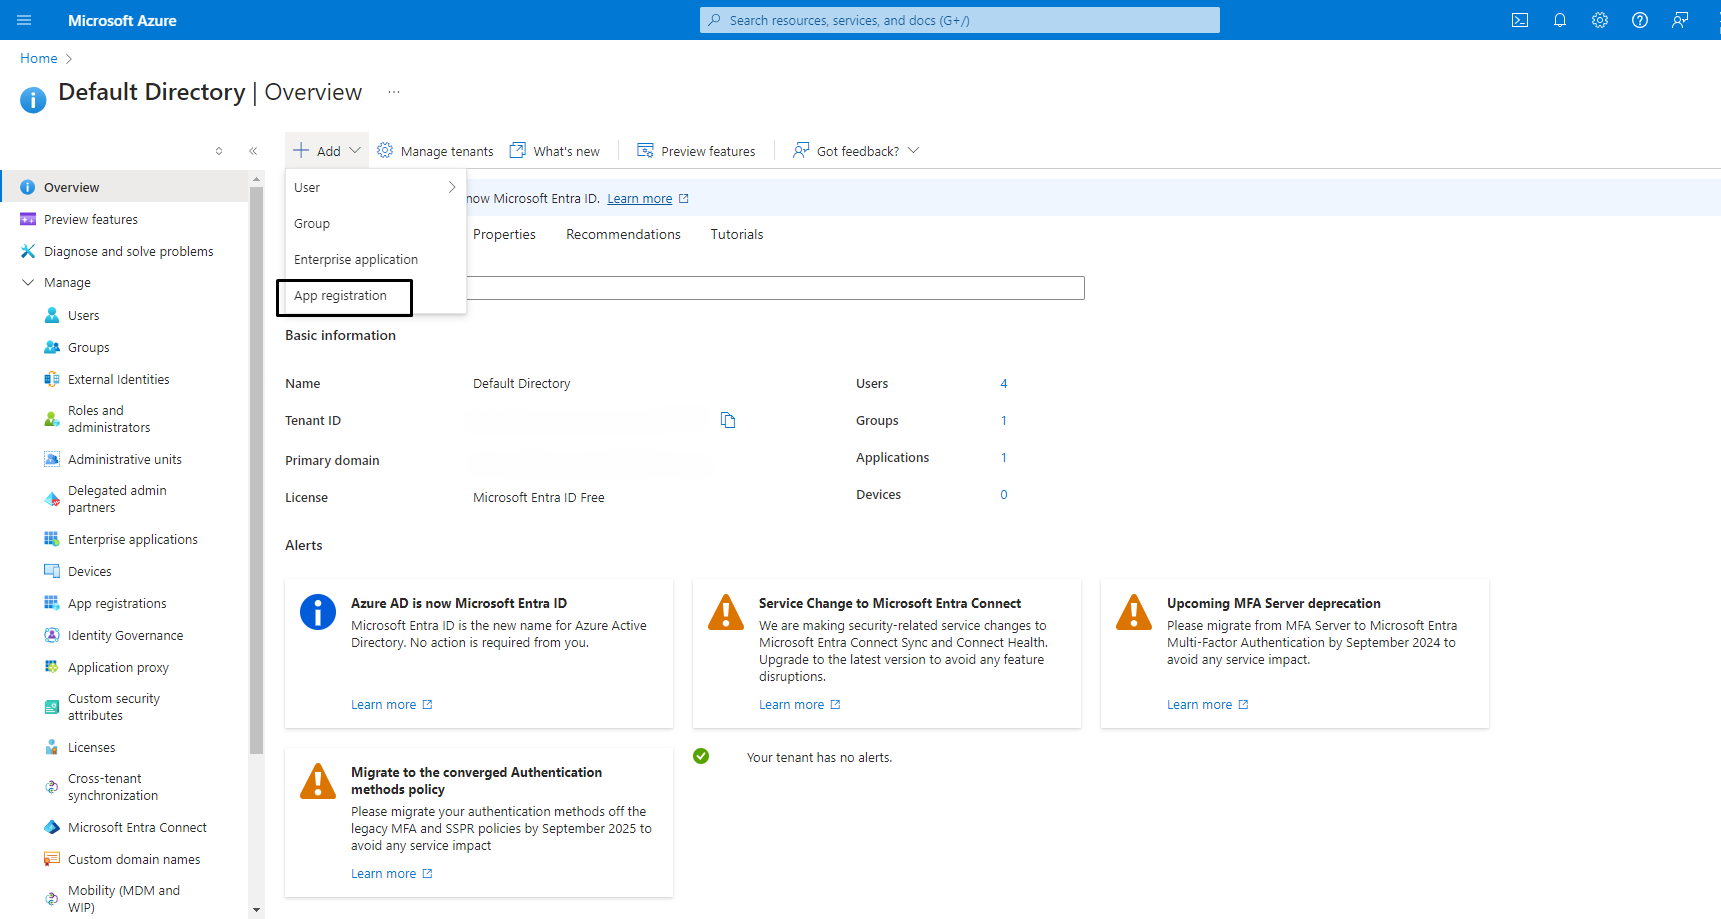
Register an application and provide the following information:
The redirect URI, which requires the URL of the Azure OAuth callback of your GitLab installation. For example: For the v2.0
https://gitlab.example.com/users/auth/azure_activedirectory_v2/callback


The application type, which must be set to Web.
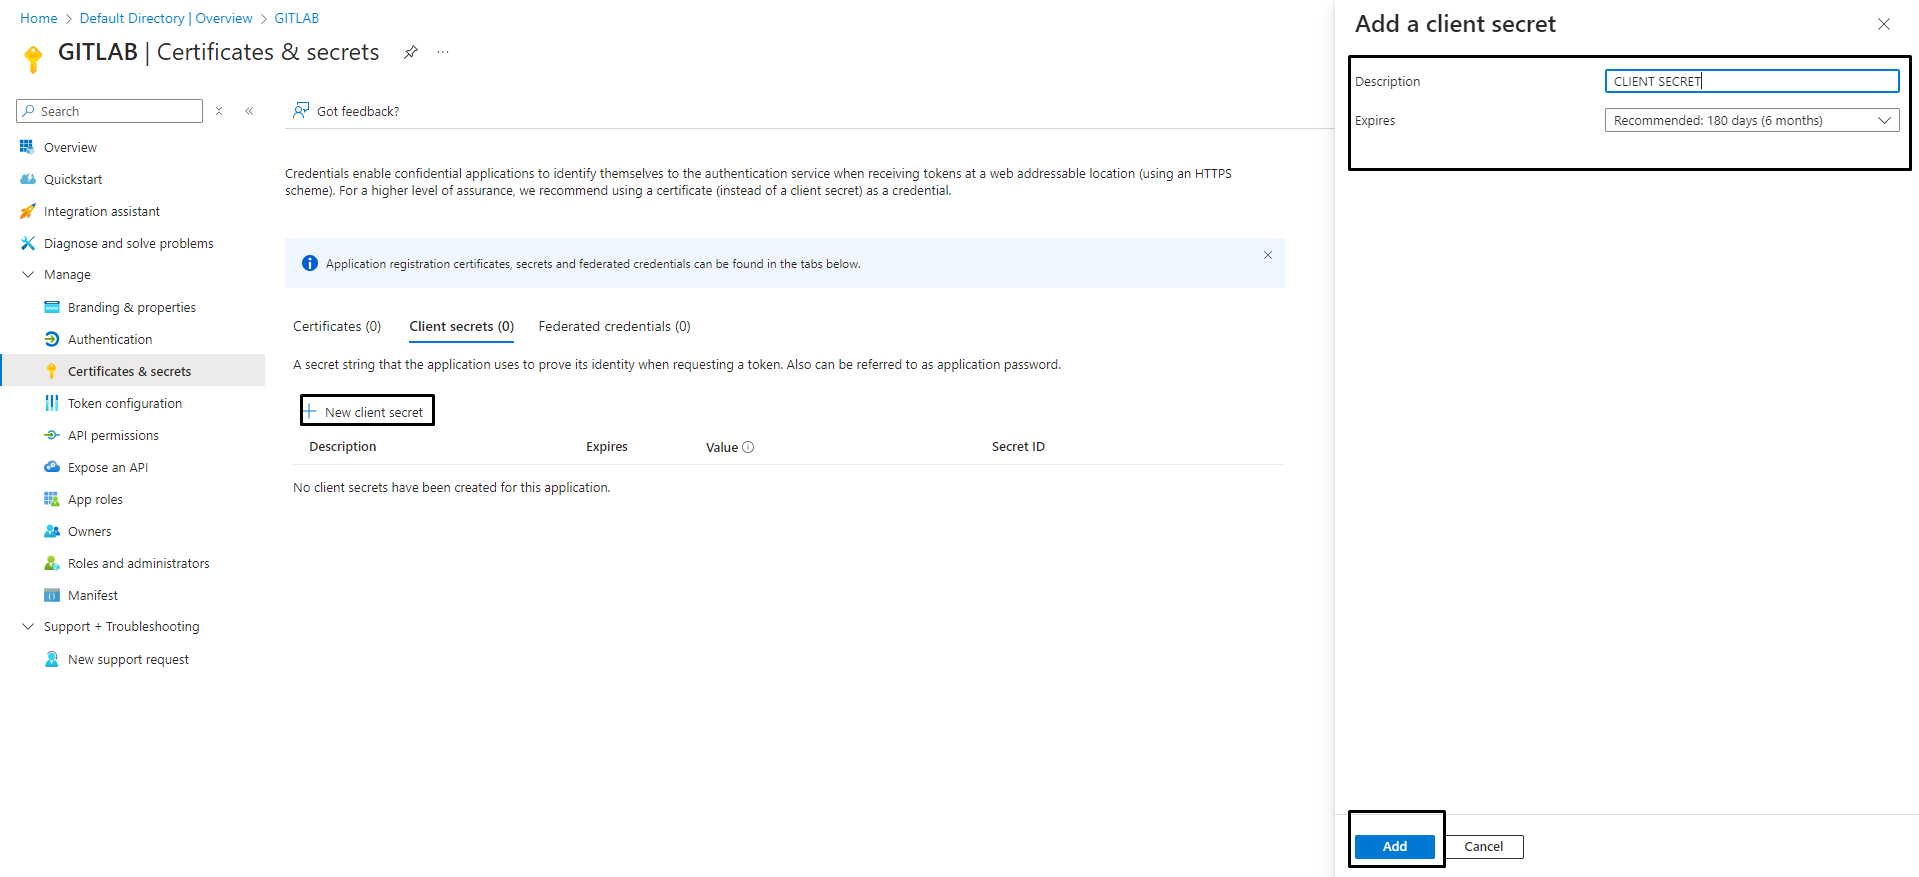
Save the client ID and client secret. The client secret is only displayed once.
If required, you can create a new application secret.
client ID and client secret are terms associated with OAuth 2.0. In some Microsoft documentation, the terms are named Application ID and Application Secret.
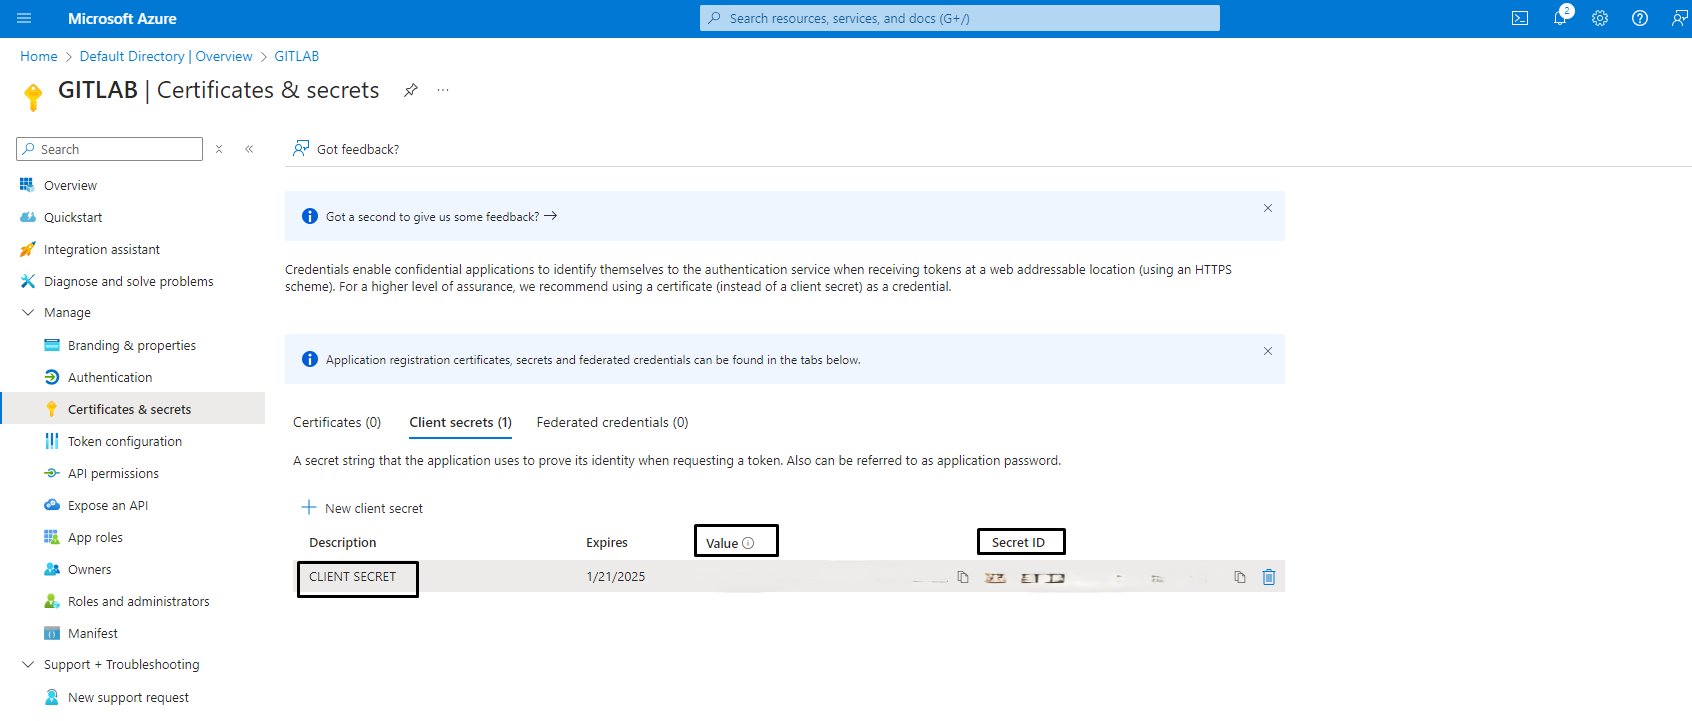
Step3: Enable Microsoft OAuth in GitLab
On your GitLab server, open the configuration file.
- For Linux package installations:
sudo vi /etc/gitlab/gitlab.rb
Configure the common settings to add azure_activedirectory_v2 as a single sign-on provider. This enables Just-In-Time account provisioning for users who do not have an existing GitLab account.
Add the provider configuration. Replace <client_id>, <client_secret>, and <tenant_id> with the values you got when you registered the Azure application.
- For Linux package installations:
					gitlab_rails['omniauth_providers'] = [
  {
    "name" => "azure_activedirectory_v2",
    "label" => "Azure AD v2",
    "args" => {
      "client_id" => "<client_id>",
      "client_secret" => "<client_secret>",
      "tenant_id" => "<tenant_id>",
    }
  }
]
After making changes to the configuration, run the following command to apply the changes:
sudo gitlab-ctl reconfigure
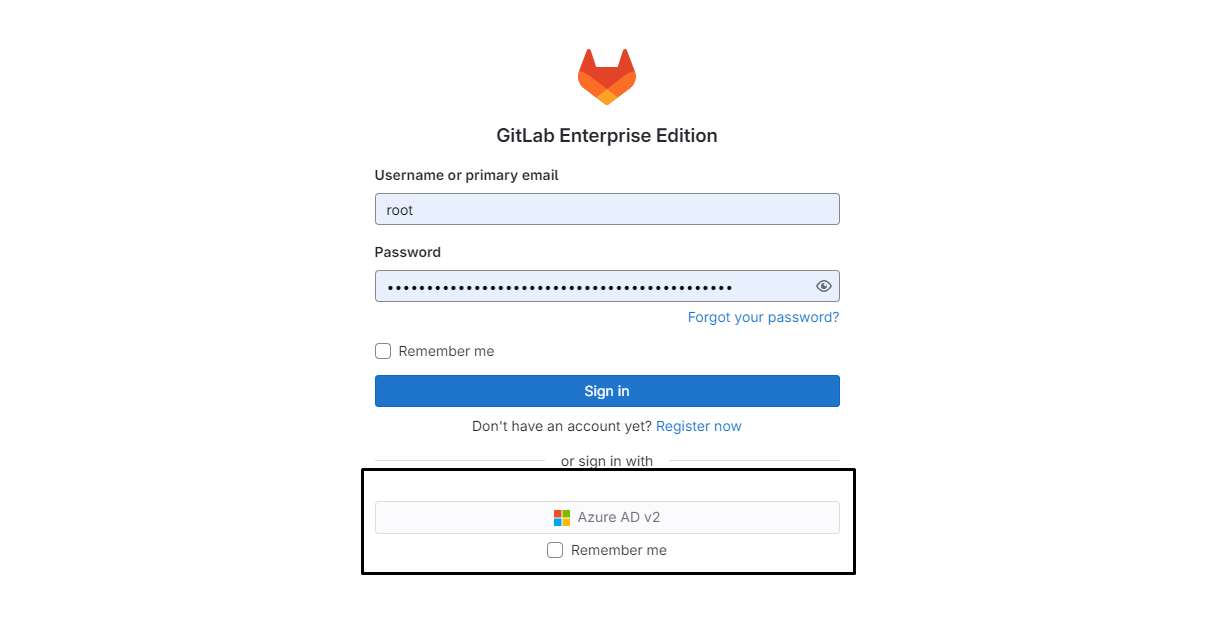
Step4: Managing Users in Azure Active Directory (AD)
Adding a User in Azure Active Directory (AD):
To add a user in Azure AD, follow these steps:
Sign in to the Azure portal.
Go to https://portal.azure.com.
Sign in with your Azure account credentials.
Navigate to Microsoft Entra ID:
In the left navigation pane, click on “ Microsoft Entra ID”.
Add a New User:
In the Microsoft Entra ID blade, click on “Users” under “Manage”.
Click on the “+ New user” button at the top.
Enter User Details:
Fill in the required details for the new user, Identity including:
First name and last name
Username (email address)
Password (choose whether to auto-generate or create a custom password)
User role (such as User or Admin)
Assign User to Groups (Optional):
Optionally, you can assign the user to one or more groups by clicking on “Add to groups” and selecting the appropriate groups.
Review and Create:
Review the user details to ensure accuracy.
Click on the “Create” button to add the user to Azure AD
“OR”
Inviting Users to Azure Active Directory (AD):
Azure Active Directory provides the option to invite users who do not have accounts in your organization’s directory. Follow these steps to invite users:
Sign in to the Azure portal:
Go to https://portal.azure.com Sign in with your Azure account credentials.
Navigate to Microsoft Entra ID:
In the left navigation pane, click on “ Microsoft Entra ID”.
Invite Users:
In the Microsoft Entra ID blade, click on “Users” under “Manage”.
Click on the “+ Invite user” button at the top.
Enter User Details:
Fill in the required details for the user you want to invite, including:
First name and last name
User’s email address
Invite message (optional)
Configure Invitation Settings:
Optionally, you can configure additional settings such as:
Invite expiration: Set an expiration date for the invitation.
Redemption URL: Customize the URL where the user will redeem the invitation.
Send Invitation:
Click on the “Invite” button to send the invitation to the user.
Review Invitation Status:
Once the invitation is sent, you’ll see a confirmation message.
You can also track the status of invitations by navigating to “Users” > “User settings” > “Invitations” in the Azure AD portal.
User Redemption:
The invited user will receive an email with instructions on how to accept the invitation and create their account.
Once the user accepts the invitation, they will be added to your Azure AD directory.
Step5: Adding Users to an Enterprise Application and Groups in Azure Active Directory (AD)
Azure Active Directory allows you to manage access to Enterprise Applications by adding users and assigning them to groups. Follow these steps:
Sign in to the Azure portal:
Go to https://portal.azure.com.
Sign in with your Azure account credentials.
Navigate to Microsoft Entra ID:
In the left navigation pane, click on “ Microsoft Entra ID”.
Manage Enterprise Applications:
In the Microsoft Entra ID blade, click on “Enterprise applications” under “Manage”.
Select Application:
Choose the Enterprise Application to which you want to add users and groups.
Add Users:
In the Enterprise Application overview, click on “Users and groups” in the left-hand menu.
Click on “+ Add user” to add users to the application.
Select the users from your Azure AD directory that you want to grant access to the application.
Assign Users to Groups:
In the “Users and groups” section, you can also assign users to groups.
Click on “+ Add user/group” to assign users or groups.
Select the desired users or groups from your Azure AD directory.
Configure Access:
Depending on the application’s configuration, you may need to configure access settings for the users and groups you added.
This may include specifying roles, permissions, or access policies within the application.
Review and Save:
Review the users and groups you’ve added and their access configurations.
Click on “Save” or “Apply” to save your changes.
Conclusion:
To implement SSO between self-managed GitLab Enterprise and Azure AD, create and configure a SAML-based SSO application in Azure AD, and configure GitLab to use SAML for authentication. Update the GitLab configuration with the necessary SAML details from Azure AD, then reconfigure GitLab. Finally, test the SSO login process to ensure users can authenticate using their Azure AD credentials. This setup enhances security and simplifies user management by centralizing authentication.
